Easy Podcast Video Editing With Reaper
So you’ve probably noticed the buzz around podcast videos on YouTube lately. It’s a lot. But how do you add podcast video editing to your workflow without spending a lot more time? Easy peasy. You can use Reaper to add a few quick visual elements to make your podcast video YouTube-ready. We’re here to show you how quickly and easily you can do this.
What Are the Types of Podcast Videos You Can Make
First and foremost, you need to decide which type of video you want to make. There are three main types:
- Static content videos
- Motion content videos
- Videos with a mix of static (usually the intro and outro) and motion content
The Best Choice for Your Podcast Video Is the One You Can Keep Doing
It’s important to decide on which type of podcast video you want early. This will help you to create the most straightforward workflow. All types of videos are getting traction on YouTube, so the choice you make for your podcast videos is yours and yours alone. Obviously, you can spend more time editing the mixed videos in #3. And conversely, in #1, the static content video is the quickest because there is only one static image for the entire video. This means that there is nothing to edit visually. You are simply adding the image to the audio, which is super fast. I’ll share quick tips and tricks on how to create all three types of videos in Reaper. It’s good to keep in mind the different time commitments of each so that you pick the video type that fits your schedule.
It probably goes without saying, but you’ll need to download Reaper before doing any of the below tasks. There is a free trial period, and after that, it’s a one-time $60 charge. This is much cheaper than the Adobe Suite of audio/video tools.
Creating a Quick and Simple Static Content Podcast Video in Reaper
Reaper is incredibly customizable. This can make things complicated, but it doesn’t have to. I use Hindenburg as my primary DAW because I find Reaper’s audio editing learning curve too steep. But creating and editing videos in Reaper is the opposite; it’s super easy! Here’s how to create a simple static content podcast video for YouTube.
1. Drag the podcast audio file into the main section of Reaper (the top track in the below image)
2. Drag the YouTube-ready artwork into Reaper into a different track, either above or below the audio. (I dragged it into the second track in the below image)
Both of these inputs are quite fast. For example, when I drag a WAV file with a mixed down 60 minutes, it takes maybe 10 to 15 seconds to process. The image file is even quicker.
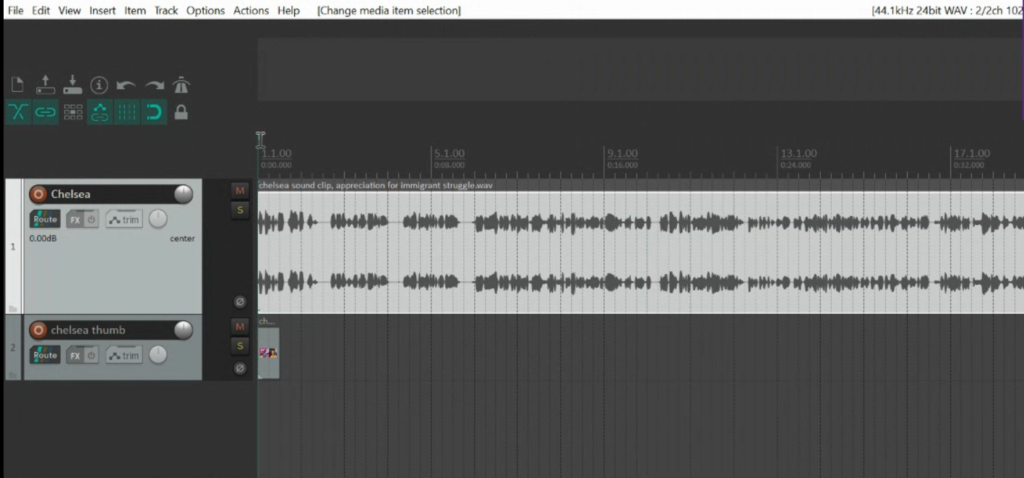
Here’s what it should look like after doing steps 1 & 2. You can see the tiny image below the audio. Now we need to do one quick thing to make the image last the same amount of time as the entire audio track. Ready?
3. Use your mouse to grab the handle on the right side of the image and pull it to the right. Pull it until it reaches the end of the audio track that’s above it.
Here’s a timelapse of what stretching the image out will look like.
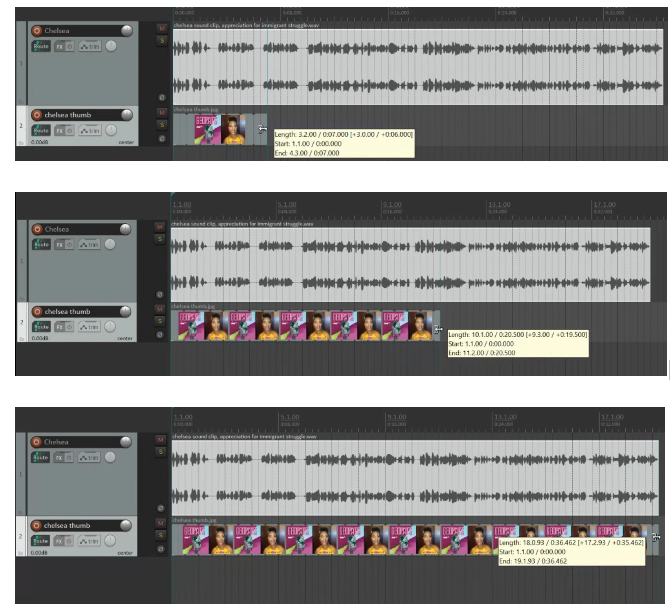
The image will look like it’s replicating itself, but don’t worry. It will appear as one image during the entire video. Press your space bar once to start playing the video to see how it looks. Press the space bar again to stop the playback.
Editing a Motion Podcast Video with Reaper
If you’ve already got a full video recorded for your podcast episode, this next type of podcast editing is for you. Maybe your podcast video is from a live event or recording. Many podcasters like to record videos just to see their guests, even if they may not be used.
Edit the Audio and Video in a Single Track to Keep Things Simple
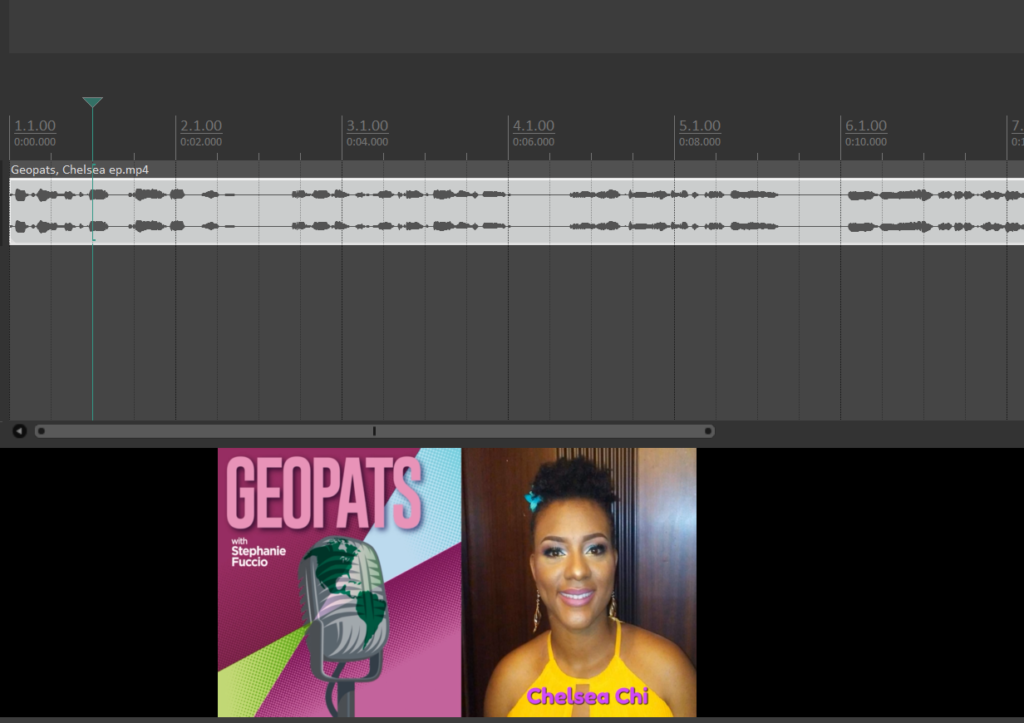
The Reaper screen will look a little different when you drag the video into a track. Do not panic. It will show the audio in waveform and the video on the screen, but NOT in a track. Below is an image of what this looks like. We’re covering the simple way of editing podcast videos with Reaper, so we’ll keep the audio and video combined for this task. But you may want to know that you can, of course, split them up. By splitting them, you can edit the audio and video separately. For this post, however, we’re showing how to edit the audio and video at the same time. This way, deleting a section will remove both the audio and video from that section.
Deleting Video Clips in Reaper Is Very Easy
There are only a few key things you’ll need to know to edit your podcast video in this single track. First, the S key will split a section in two, creating a break. So if you want to delete a section, get the cursor at the beginning of it and click S. You’ll see a break in the track. That’s good. Then do the same at the end of the section. Press S again. You’ll see another break. You can now hit the DELETE key, and the entire section within the S breaks will disappear. Now drag the tracks closer to each other. That’s how you can remove sections in Reaper.
Edit Very Little to Avoid Too Many Jump Cuts
Yes, this will create jump cuts. These are jarring visual moments when the movement in one part of the video does NOT continue in the next part. In audio, it’s simpler to match the sound before and after the cut. Video is very different. It’s harder to match the image before and after the cut perfectly. The viewer sees these incongruities. This is why unless you have serious mad video editing skills to create visuals to smooth over these jump cuts, I caution you to edit VERY lightly with podcast videos. When I do this, I remove mostly huge mistakes. I also remove items at the beginning and end of the video. These don’t cause jump cuts because there isn’t a visual before/after them.
Mixing a Podcast Video With a Combination of Static and Live Images
If you’re wanting to add a static content intro and outro to your live podcast video, you’ll use a combination of the skills mentioned above. This gets more fun and complicated fast. Check out Kenny’s Reaper Mania YouTube channel and the Reaper Blog for tips for when you get stuck.
Rendering a Video in Reaper
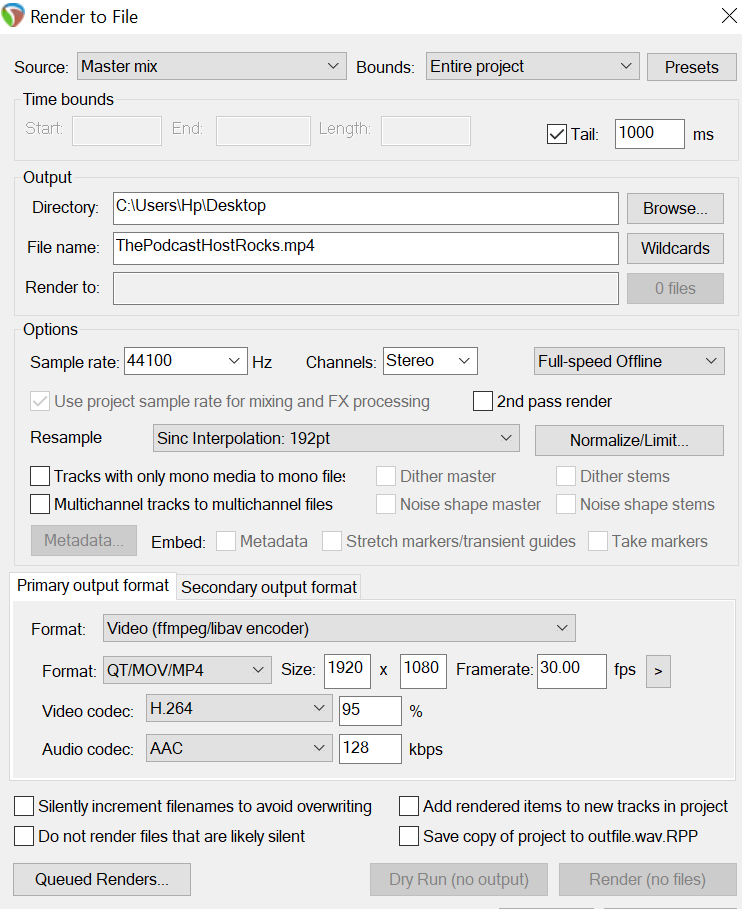
Rendering videos in Reaper might take a little bit of setup. It’s well worth it. First, you’ll want to render by going to File> Render OR using the Ctrl-ALT-R shortcut keys. Then change the Source, File name (add “.MP4”), and select the video format options at the bottom of this screenshot.
Also, don’t worry if your video rendering takes a while to process. A one-hour file often takes one hour of MP4 rendering time. When I first rendered videos with Reaper, the files were huge. This meant that it took a long time to upload them to YouTube. The way to make them smaller (lighter) and cut that upload time down massively is to follow the “Primary Output Format” in the below screenshot. This could be a default in your Reaper settings, OR you may have to install something to make this work. It depends on your Reaper version, I believe. If you need to download a file, follow the instructions in this Reaper Blog Post. It’s super quick and easy. Promise.
Podcast Video Editing Is Like Riding a Bicycle
This might look like a bit to get used to just for a podcast video presence on YouTube. There are alternatives, of course. You can just stream your recording live to YouTube and not edit at all. If you do this, the live chat room comments will remain intact. And that’s good, right?
Once you master the above steps for your podcast video in Reaper, you can make it fancier if you wish. There’s a lot of potential in Reaper for video editing.
Although there are some technical tips in this post, the most important thing is to help you see what your options are. This way, you can make conscious choices about your podcast video editing presence. Your viewers won’t know what technology you used to make your podcast videos. They just want your wonderful content. So get it out there in podcast video format if you wish. But do it in the easiest way possible so that you’re still enjoying the process.