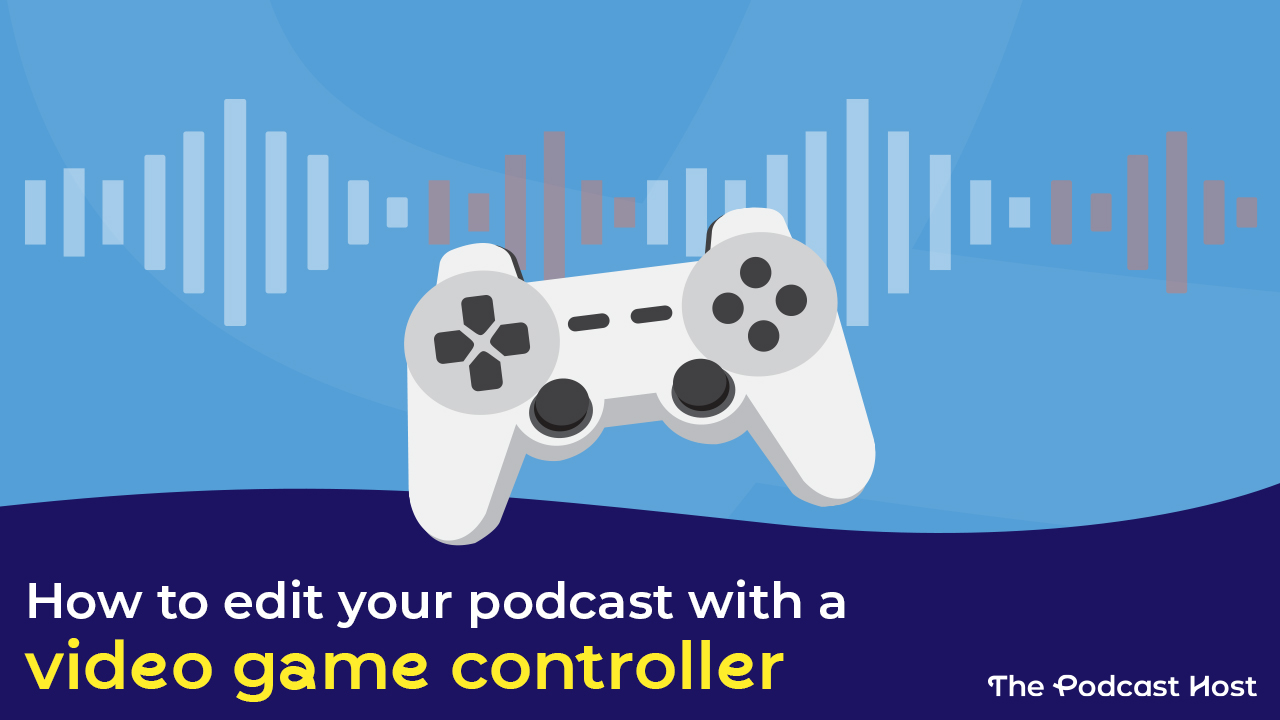
Why You Should Use a Video Game Controller to Edit Your Podcast
I am fortunate that editing audio and podcasts is my full-time job, so I spend a lot of time at the computer with my DAW open. Much of the process has become muscle memory, and there’s been a lot of trial and error to customise my setup and how I work.
When I started editing full-time, I found that I often had to navigate through multiple menus with the mouse to find specific functions. Sure, there were hotkeys, but I only have so much capacity to remember all the different combinations of the ctrl, shift and alt buttons to get things done. I also had to use my mouse for very detailed tasks like adjusting individual track volumes or plugin parameters. These are things I wanted more tactile control over.
More Control, You Say…
One night, while I was streaming, a viewer in chat mentioned that they used an Xbox controller to help them with their Photoshop work. Curious about whether or not it would work for audio editing (and the possibility I could get a new game controller as a work expense), I looked into the idea, did some experiments, and now I swear by it.
Adding a game controller to my audio workflow is one of the best decisions I’ve ever made, and now I’m going to turn this little soapbox The Podcast Host has given me and use it to tell you why you, yes you, need a game controller in your audio editing workflow.
But… Why a Game Controller?
So, some of you nerds may ask, ‘Why a game controller? Why not just buy a mixing desk or a control surface?’. And it’s a fair question. You could buy a mixing desk; there are some very good ones out there. Some of the more expensive ones have mechanised faders, which adjust to your tracks’ volumes, too. This means you have a physical, tactile representation of your levels, allowing you to mix a lot more by feel than by numbers on a screen.
But here’s the thing. I reckon there is a non-zero chance that if you edit audio, you also play video games, so there is a pretty good chance you already have a game controller. And there’s a good chance it’ll work with your computer. I had a cheap, off-brand Playstation controller when I started experimenting with this idea, and it worked really well…until it broke, after which I upgraded to a standard Xbox controller.
Video game controllers also don’t take up much desk space, as your average soundboard does. Most modern controllers use Bluetooth, saving you a USB slot, too. Sometimes it can be quite a fiddly process to try and get a mixing desk or control surface working in your DAW, whereas a game controller – at least the way I use mine – works by assigning hotkey parameters to the controller buttons. There’s no menu-diving into the backend of your software to get going straight away.
Remember that slightly odd sentence about mixing by feel rather than by numbers? You can get that same tactile feeling from using an analogue stick instead, and you can calibrate your controller’s sensitivity to be as granular as you could possibly imagine.
Okay, so How Do I Set up a Video Game Controller to Edit Podcasts?
By means of a demonstration, here is a layout of how I use my Xbox controller in Reaper.
As a side note, I only really use Reaper as my DAW due to the sheer level of customisation options and setups for different workflows. But many other audio editing solutions are available.
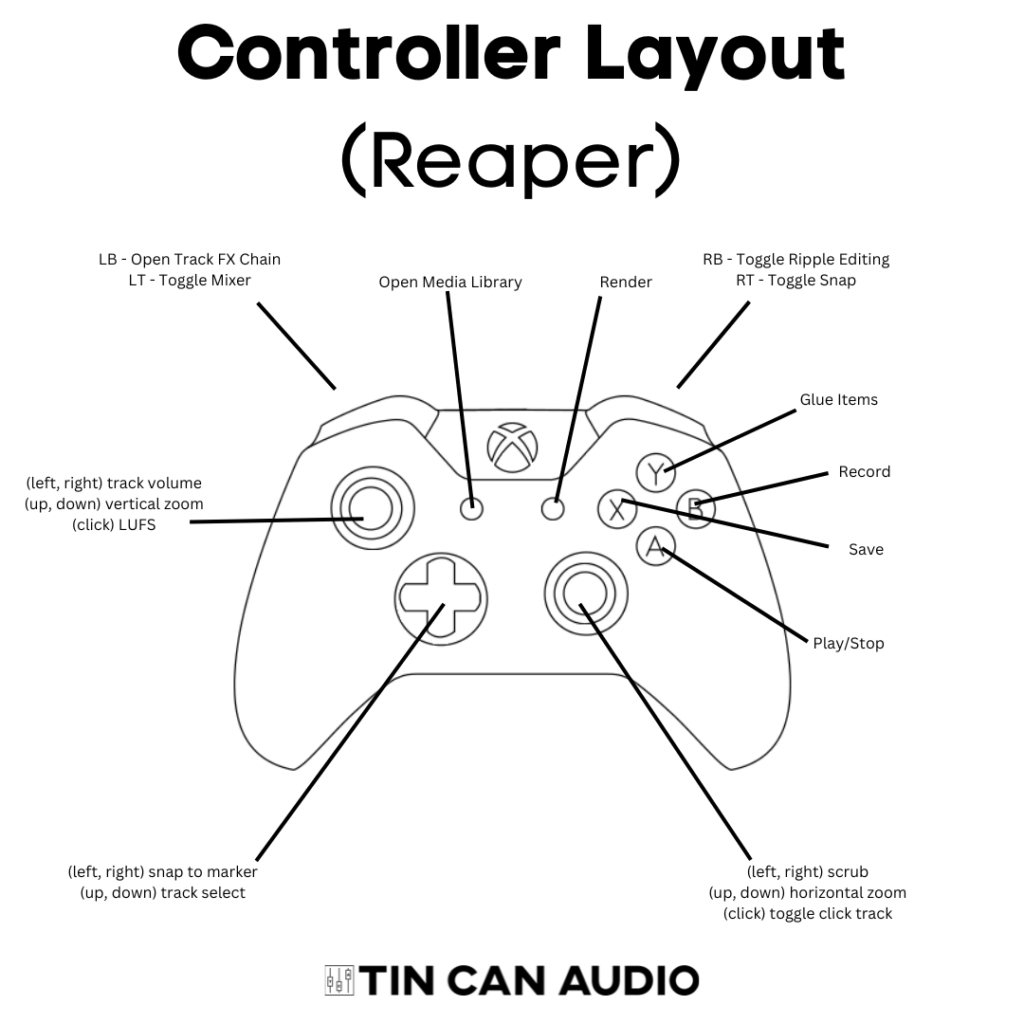
Once I had my controller plugged in, I pulled up a list of Reaper hotkeys and used a program called AntiMicro. AntiMicro allows you to map keyboard inputs to the controller and set it up for audio editing. It took a bit of trial-and-error to figure out which functions were the most useful, but to give you a brief rundown:
- I use the vertical D-pad to scroll through tracks (usually ctrl+alt+up/down) and the horizontal D-pad to snap to markers on the timeline within the project (usually the square brackets)
- I use the left analogue stick to control individual track volumes (usually ctrl+up/down) as well as a vertical zoom (usually ctrl+mouse wheel)
- I use the right analogue to scrub through the project timeline as well as horizontal zoom (which are usually mapped to the arrow keys)
- I use the right shoulder buttons to quickly toggle two editing functions I frequently use: snap-to-grid (usually alt+s) and ripple editing (usually alt+p)
- I also have the select button mapped to open Reaper’s built-in media library (usually ctrl+alt+x), where I have a database of my sound effect library, meaning I don’t have to open four hundred folders in Windows Explorer.
Video Game Controller Editing: Shortcutting the Shortcuts
Using a controller, I can quickly perform essential editing functions in my DAW without memorising a load of keyboard shortcuts (and becoming a finger contortionist in the process).
It feels a lot more intuitive, and I spend less time trying to find the mouse on my screen and more time doing the work. It also just… I don’t know… feels better. For some reason, adjusting parameters with an analogue stick feels a lot better than adjusting a virtual representation of the same parameters, whether an image of a dial or a fader.
Adding a game controller to my audio editing workflow has really been a boon to my work. I work faster, and feel more focused and plugged into what I’m working on. So, if you happen to have one lying around, maybe give it a try.
…just remember to close AntiMicro after you’re done. Otherwise, it will ruin your gaming experience.