How to Screen Record (on iPhone, Mac, & PC) for Video Creators
In a world of “show, don’t tell,” the widespread ability for anyone to record anything has been (mostly) a blessing. That’s especially true for online educators and video creators who want to help others achieve a specific goal.
Whether you’re walking your audience through a system you’ve built or you’re giving a step-by-step tutorial, recording your screen has never been easier.
First, let’s walk through the built-in tools for each platform…then I’ll share my favorite tools.
Built-in Screen Recording Tools
One of the reasons screen recording has never been easier is most devices have a built-in way to do it.
Screen Recording on iPhone
If you’re an iOS (or iPadOS) user, you can access the screen recorder by opening the Control Center and pressing the record button:
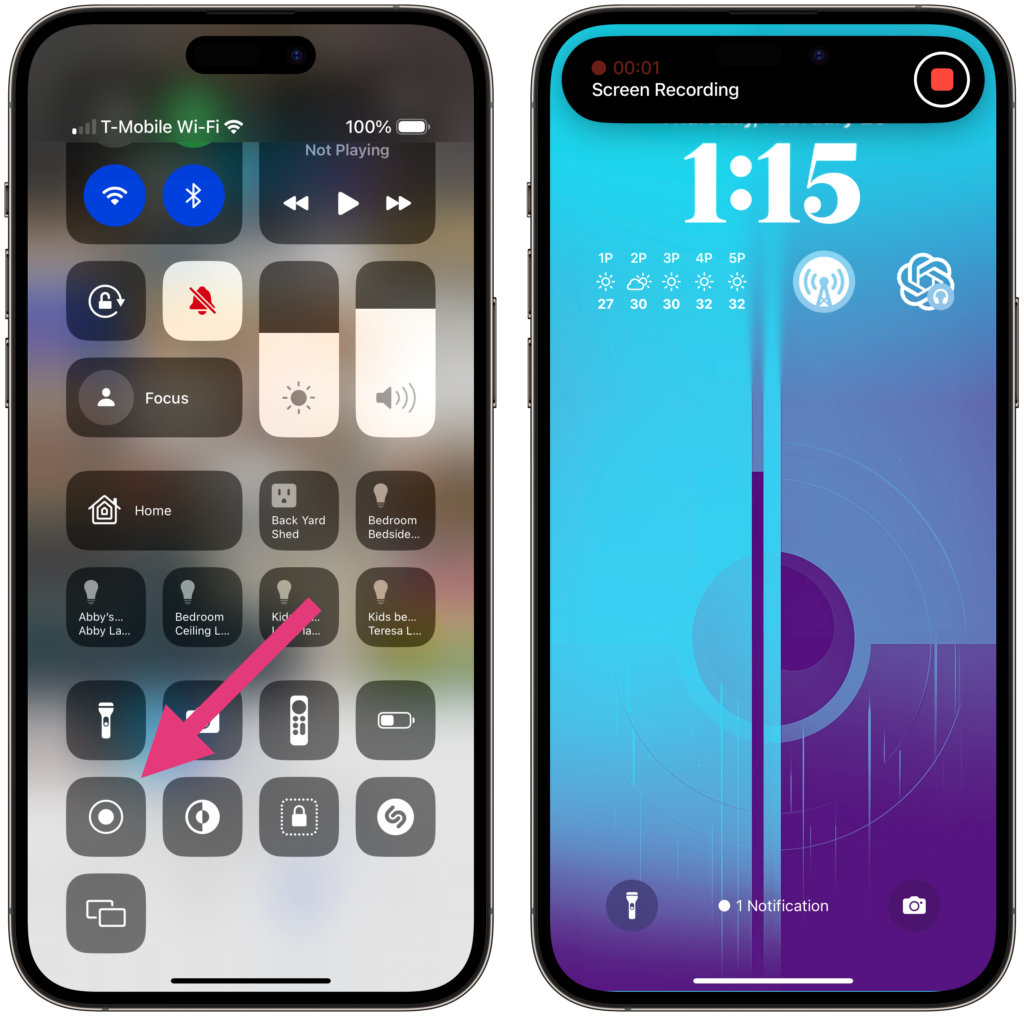
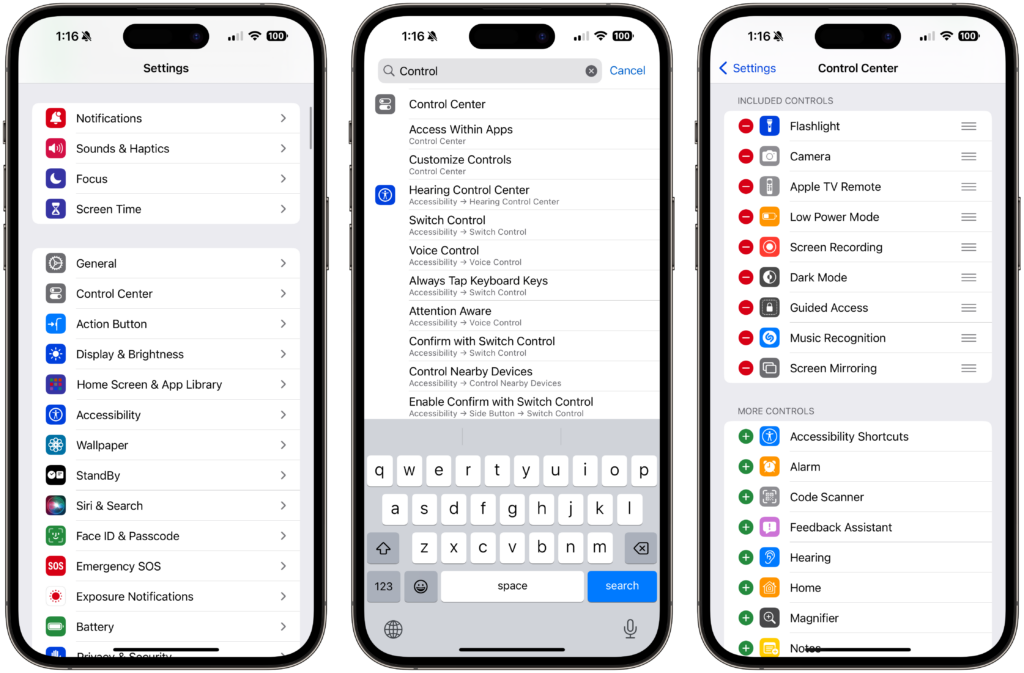
If the record button doesn’t show up in your Control Center, you add it by going to Settings -> Control Center, and dragging it into the “Included Controls” section:
Screen recordings will automatically be saved to your Photos library — though it’s worth noting that audio will not get captured.
Screen Recording on Mac
If you’re on a Mac, you can use QuickTime. Open the app and go to File -> New Screen Recording.
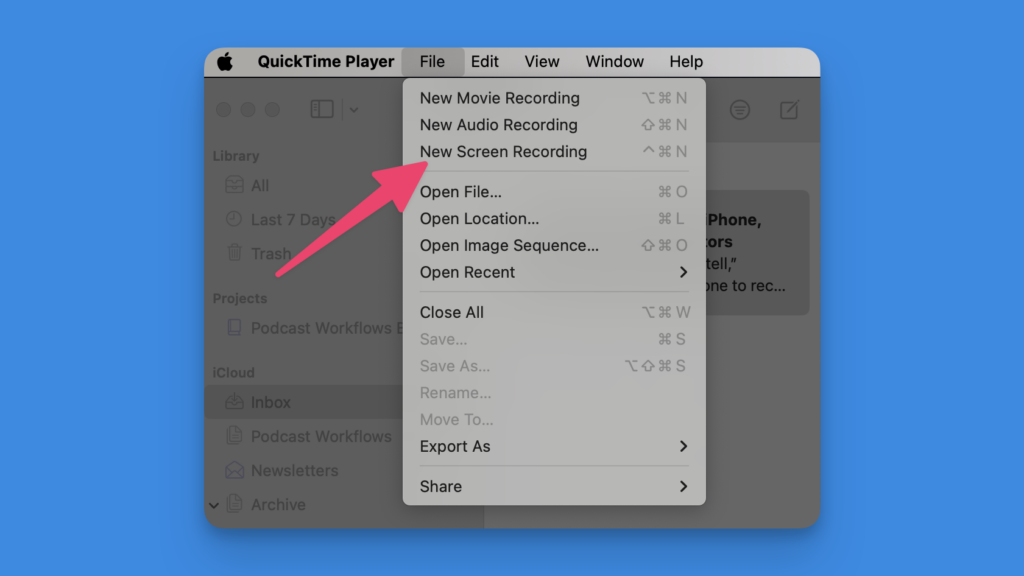
From there, you’ll be able to choose if you want to record the full screen, or just a portion of the screen:
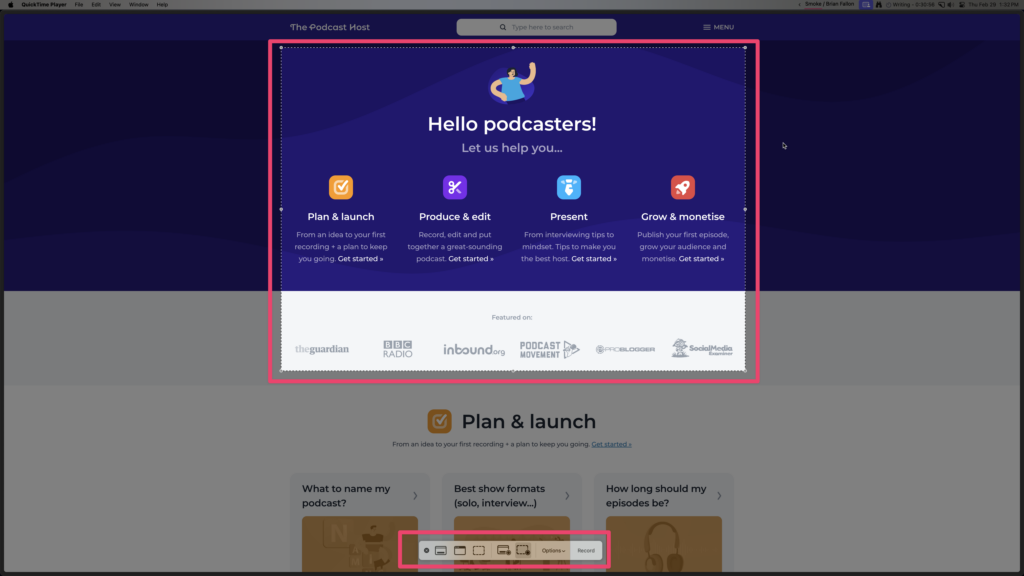
Much like iPhone, no audio is captured, but you will have the opportunity to make light edits, and save it.
Screen Recording on Windows
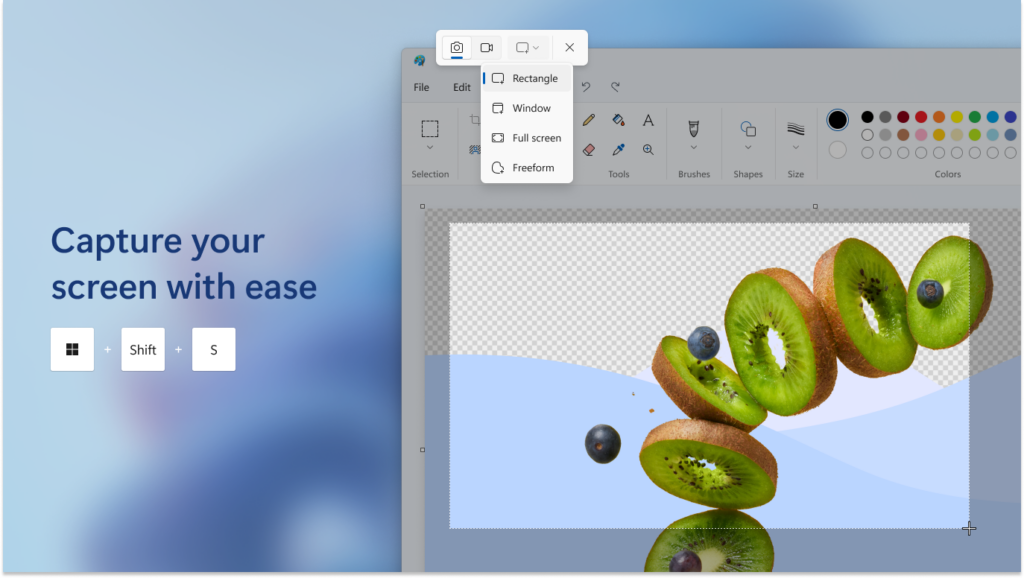
If you’re on Windows, there’s a great app called Snipping Tool that comes pre-installed. It’s also available from the Microsoft Store.
It works very similarly to QuickTime, and there’s a great tutorial here, from Microsoft.
Advanced Screen Recording Tools
If you’re looking for something beyond the stock recording apps, don’t worry! There are lots to choose from.
While this isn’t a comprehensive list, these are some of my favorites—and I’ve been around the block multiple times.
Lightweight Screen Recorder Apps
There are some single (or…basically single?) purpose apps that do a great job of recording your screen and immediately prepping it for sharing.
Loom
Loom has long been a standard bearer for the industry. It’s fast, versatile, and available for Mac, Windows, iOS, and Android. It even has a Chrome App!
It allows you to record your screen or your screen and camera. Then, it uploads the video to its servers and gives you a link to share. You can even have viewers comment and react, and you have privacy and password settings.
Loom is free to get started.
Tella.tv
Tella.tv is a relative newcomer with a slick interface and some cool features. While it can do almost everything Loom can do, it touts some advanced editing features, like creating clips and multiple layouts.
The biggest drawbacks are that it’s not free (though it offers a free trial), and it’s Mac and Chrome only. There are no native Windows, iOS, or Android apps.
Vimeo Recorder
If you’re looking for the very basics, you can try Vimeo Recorder. This is a free tool, though it will contribute to the uploads in your Vimeo account, so you may need to pay for that if you record a lot.
It will allow you to record your screen, or your screen and camera, though I’ve found it’s not very flexible for your camera view.
If I had to pick (and I have), I’d go with Loom. It’s tried and true, flexible, and available everywhere.
Heavy Duty Screen Recording Tools
Now, if you’re looking for something to record your screen, and camera, and give you full flexibility while editing, you want a video editing tool.
Screenflow
Screenflow is a fantastic option for the Mac. It’s been around a long time and works super well. It’s purpose-built for recording screencasts/tutorials, but it can also import video, highlight mouse clicks, completely erase your cursor, and even record from your iOS device.
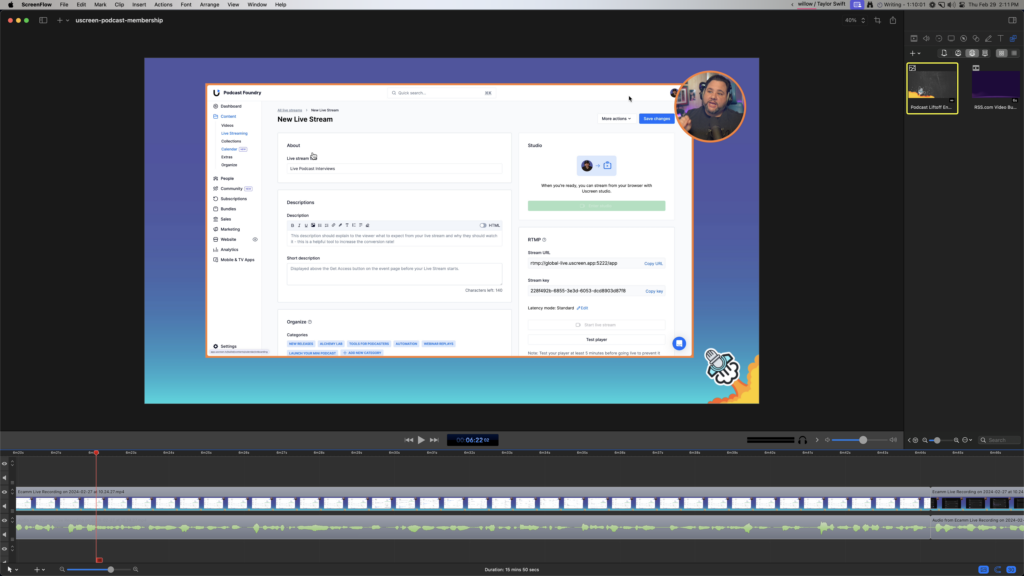
I’ve been using it for years and have never been disappointed.
Screenflow starts at $169.
Camtasia
If you need something that also works on Windows, Camtasia has become an industry standard—especially in higher education. It tracks cursor data, has a bunch of templates to work from, and allows for some fantastic animations.
Camtasia starts at $179.88. (Our link here is an affiliate!)
Descript
Finally, I’d be remiss if I didn’t mention Descript. While it’s known for podcasting and editing via transcript, you can record your screen directly into the app. And while it’s not as robust as Screenflow or Camtasia, it gets the job done and can be a great solution
It’s worth noting that these are primarily desktop applications — full editing suites that have ways to record a mobile screen. But your best bet here would probably be to record using the built-in recorder, and import…unless you’re using Screenflow!
So Many More Screen Recorder Options!
We covered a lot of tools here, but there are many more out there. If you’re looking for something more bespoke, or with a specific use case in mind, you’ll no doubt be able to find the perfect solution for you.
But from basic and free, to more advanced and robust, there’s no shortage of ways for you to record your screen.
On a final note, if you’re looking to sharpen your video podcast game, here are some follow-up resources: