Recording Skype Calls for a Podcast: The Definitive Guide
Recording Skype calls was once considered THE way to do remote podcasting with co-hosts or interviewees in far-flung places.
Well, that’s not 100% true. For a long time, you couldn’t actually record with Skype. You could use it to run the call itself, but you’d need some additional tech (hardware or software) to capture the conversation.
A few years ago, Skype introduced its own call recorder feature, so podcasters wouldn’t need to use third-party tools. We’ll talk about how that works in this guide, as well as explore some other options. First up though, let’s talk about the pros and cons of recording a podcast on Skype…
Recording Skype Calls for a Podcast
Podcasting remotely means you can interview interesting people with cool accents from different continents, all from the comfort of your own home. Recording with Skype is still a popular way of doing remote podcasting, but is it the best? Here are the potential ups and downs.
Pros
- Skype is free to use and widely known
- It has a built-in call recorder
Cons
- Your guest needs an account to join in the call
- The call is recorded over the internet, as opposed to ‘double-ender’
‘Double-ender’ call recording has become the default demand of remote podcasters in recent years. It basically means that both sides of a conversation are recorded on separate tracks, locally on the computer of each participant and saved directly to the cloud.
A double-ender protects against hitting a bit of internet turbulence mid-conversation. Your call may drop out or stutter, but this won’t manifest in the recording itself. In fact, even if your computer completely crashes, the conversation up until that point will safely be stored in the cloud. Skype’s own recorder doesn’t do double-ender recording, but there are plenty of good tools out there that do (Squadcast and Riverside, to name but two). The trade-off is that you’ll pay a monthly subscription to use dedicated double-ender call recorders. For many podcasters though, this is more than worth it.
Here’s our guide to the best tools for online call recording, you’ll find a few great double-ender recording options right there.
It’s worth mentioning too, that we’ve recently added a call recording feature to our very own ‘Podcast Maker’ app, Alitu. This means now you can do all your recording, editing, and production in one single easy to use platform. Perfect, if you’re looking for an all-in-one podcast creation solution!
Recording a Podcast with Skype – The Options
Okay, down to the details – how do we do it? There are a few different setups, all with their own pros and cons. Let’s have a look at the various options.
- Record Using Skype Itself
- Use Skype Call Recording Software
- Use Audio Equipment to Record Skype Calls
- Do a Manual Double-Ender
1. Record Using Skype Itself
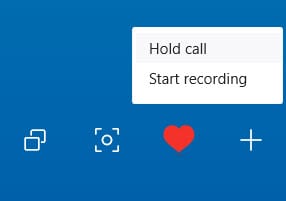
This is a really simple process. Make your Skype call in the same way as you normally would, then, once connected, click the + symbol in the bottom-right of the call window.
Click ‘Start Recording’ which will – funnily enough – start recording the call. Your guest will be notified that you’re now recording the call too.
You can stop the recording prior to the end of the call, or end the call and the recording will stop with it.
The recording will then appear in the text chat section of the call window, and you can go ahead and save it to your computer.
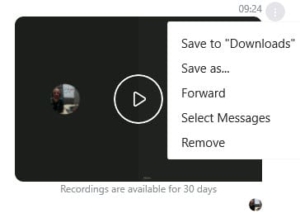
It’ll save as an mp4 file, even if you’ve been running an audio-only call. You can convert this to an audio file by simply dragging it into your podcast editing software.
At this moment in time, Skype is recording all calls as mono files so both sides of the conversation are meshed into one. That isn’t always ideal as it reduces the flexibility you have to clear the call up and balance the volume levels during post-production.
- Pros – Extremely simple to record without any need for additional software or equipment.
- Cons – Mono recording only, and video file needs converted to audio.
2. Use Skype Call Recording Software
With this approach, you simply install a piece of software that records your Skype calls, and then make your call as normal. An example of this for the PC is called TalkHelper. TalkHelper installs on your computer, and then, whenever you want to record a call, you boot up both Skype and TalkHelper, click ‘Record’ on TalkHelper, and then make your Skype call as normal.
At the end of the call, TalkHelper will package up a recording of your call, save it as an audio file, and then you can edit it, produce it and release it to the wild.
The Mac equivalent of TalkHelper is imaginatively called Call Recorder, created by Ecamm. Call Recorder is a good package, and works in exactly the same way.
Both of these packages are paid products, so this isn’t a free way in, but they don’t cost a lot – between $30 and $50 – so it’s not going to break the bank. They can be better options than Skype’s default recorder as they record on separate tracks.
A heads up though that Call Recorder is not compatible with Apple M1 Macs. In fact, the reliability of third-party Skype recording software has lessened in recent years. The companies behind them may find it difficult to keep their programmes compatible with Skype’s latest updates, given that Skype now has its own call recorder built-in.
Another downside to this approach is that it relies entirely on your computer and the software itself. If something goes wrong during recording, the computer crashes or otherwise, then the whole recording is gone. Imagine that happening when you’ve managed to line up the biggest interview of your life…
- Pros – Quick, simple, no barriers to recording.
- Cons – If your computer crashes, you lose everything. Third-party Skype recorders are also becoming less reliable.
3. Use Audio Equipment to Record Skype Calls
Recording onto a device other than your computer gives you an added safety net. If you’re recording Skype directly onto your computer, and that computer crashes mid-interview, you will lose everything. On the other hand, if you’re recording that conversation onto an external device like a digital recorder, you wouldn’t lose anything you’d recorded so far.
Using additional hardware isn’t the only way to get this extra security. As I’ve mentioned already, there are a lot of good double-ender recording platforms on the market these days. This has made quality remote recording a lot more accessible as there are few people who own a mixer, let alone know how to set one up.
That said, if you do own a mixer, then you’ll want to set up what’s known as a mix-minus to record Skype calls. I’ve linked to our guide which shows you exactly how to do that.
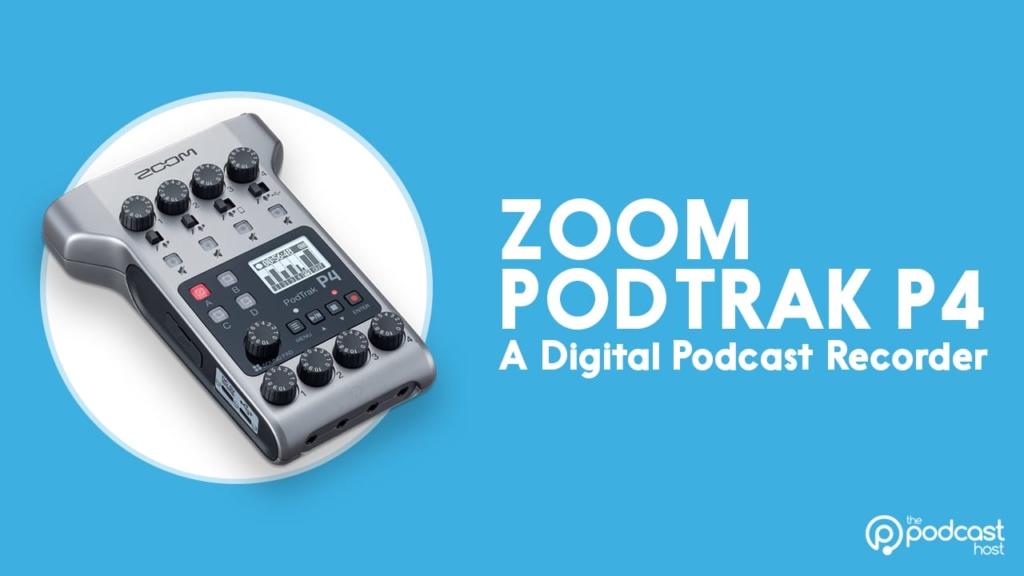
In recent years, mixers have become less popular with podcasters. This is partly due to the rise of quality double-ender recording tools, and partly due to the release of podcast-specific recorders like the Rodecaster and the Zoom PodTrak P4.
The PodTrak P4 is an especially affordable and easy to use podcast recorder. You can record calls on any platform, be it Skype, Zoom, or otherwise. What’s more, you can record phone calls too. You could bring one guest in via Skype, another in via phone, and record them (and yourself) on individual tracks. The P4 even lets you play music and effects that your remote guests will hear, and the mix-minus setting is available at the touch of a button.
The hardware approach still relies heavily on your call quality and internet connection. If a call is stuttering and dropping out, then that’s what’s going to be recorded. The double-ender approach is a way around this issue.
- Pros – More reliable. More value for your money in buying a multipurpose device. Control over individual channels.
- Cons – Extra gear means extra expense, and additional time needed to learn how it all works.
4. Do a Manual Double-Ender
We’ve talked about double-ender recording a fair bit already. This is the method where both participants record their own ends of the conversation. The files can then be synced together in production, and it’ll often sound like the recording took place in the same room, as opposed to online.
There are plenty great dedicated double-ender tools on the market. If you want to set up one manually to record via Skype though, then here’s the idea. You’d make the call as normal, and both open up audio recording software (such as Audacity) and have that running at the same time. This will only record your own voice, but your partner is (hopefully!) doing the same at their end.
Of course, computer crashes are still a risk here, so it’s even better if you’re recording your side of the conversation into an external device like the Zoom H5 or PodTrak P4.
This approach isn’t without its risks. You’re relying on your guest to hit record and do everything properly at their end. This is fine if they’re an experienced podcaster, but if they’re totally new to recording audio then it’s a better idea to opt for one of the alternative solutions in this article.
- Pros – Potential for same-room studio-quality recording.
- Cons – Heavily reliant on your guest.
Bonus Resource: Free Microphone Test
Summary: Recording Skype Calls for a Podcast
It might not be the go-to remote recording method it once was, but Skype is a completely free and well-known platform. It lets you record calls without the need for any third-party software, though the quality of these recordings will be limited.
Another slight downside is that your guest needs to have an account, whereas popular Skype rival Zoom just relies on them clicking a link. This link-click approach is also popular amongst double-ender recording platforms such as SquadCast and Riverside. You’ll also get better potential for audio quality as well as greater flexibility with the latter, though you’ll need to pay a monthly fee to run your account.
Remember, Alitu now has call recording built-in, so you can now do your recording, editing, and production in one simple ‘all-in-one’ interface.
Finally, you might get yourself a podcast recorder like the Zoom PodTrak P4. This would cover all bases for recording Skype calls as well as any other type of podcast setup.
If you’d like more help with your online recording adventures, then be sure to check out Podcraft Academy. That’s where you’ll find all of our courses, resources, downloadable templates and checklists, and we run weekly live Q&A sessions in there, too.